Recreating, 3D printing and painting a fantasy miniature
By Lassi Warsta, Heidi Salo and Simo Hiltunen JAN 21, 2019
We thought that it would be educational to recreate a vintage, handmade miniature to study how a traditional sculptor approaches the task of presenting a character as a mini. A hand crafted figure only contains a limited amount of details due to restrictions posed by the medium, tools and skills of the sculptor. The plan was not to produce an exact replica of the original mini but to create an updated, modern version of it (Figure 1). Stereolitography (SLA) based printers, such as Formlabs Form 2, can reproduce very fine details on small items and thus are well suited for printing minis. Formalabs have released a range of resins for Form 2 and we briefly tested a couple of them to see which one of the resins seemed more suitable for producing minis. We were also interested in finding out if the mini could be printed with fused filament fabrication (FFF) printers and polylactic acid (PLA) material. These printers are more common than SLA printers and they are routinely used to produce prints from downloadable 3d models. A simple test was conducted to experiment how well the different materials can withstand rough handling by breaking printed minis by hand and wire cutters. Digital painting methods enable testing of color schemes on 3d models before actually applying them on minis. We tested this approach by first designing digitally a color scheme and then painting the mini according to the scheme.
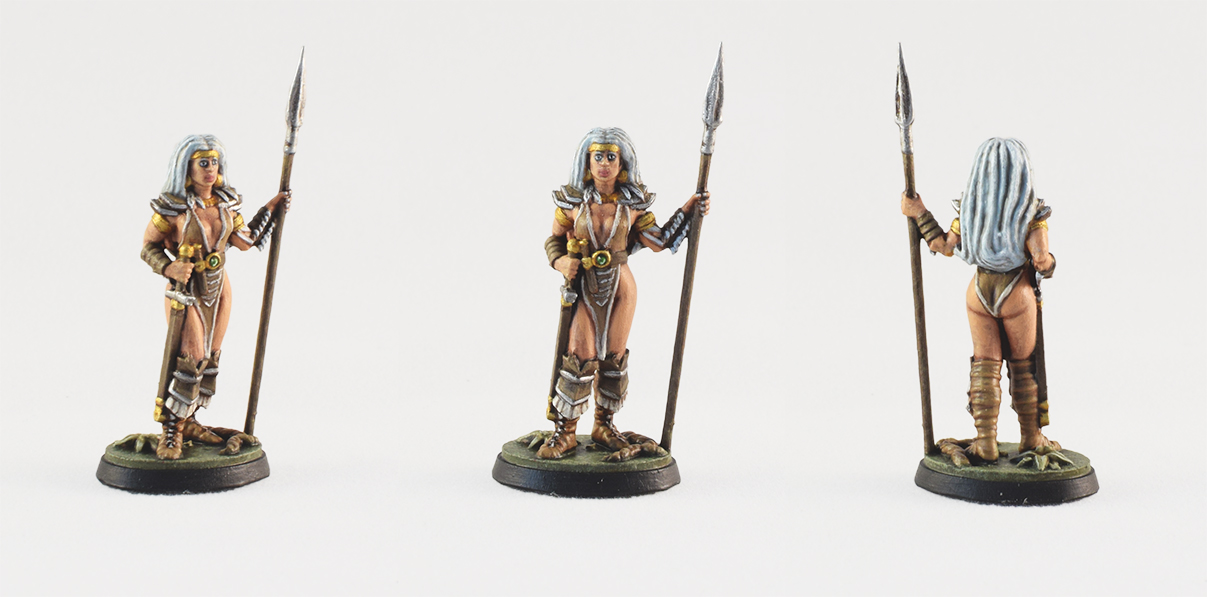
Figure 1. The recreated miniature painted with acrylic paints according to the developed color scheme. Right click on the image and select View Image for a larger version.
For the sculpted mini we selected a vintage fantasy figure representing a female ranger. We chose the particular mini, because we knew for sure that it was hand sculpted, there were good quality photographs available in the Internet and there were both small and large scale details in the mini. The original mini was sculpted by Dennis Mize and produced by Ral Partha company around 1987–1996. The mini is probably based on an illustration drawn by Clyde Caldwell and published in 1987 by TSR Inc. There are rumours circulating in the internet that after losing the license to produce the range of minis, Ral Partha was forced to destroy the molds used to cast the minis. Maybe partly due to this mint quality versions of these vintage minis are nowadays rather expensive. Photographs were found that had a ruler with a scale and these were used to assess the dimensions of the figure. We computed that the figure is approximately 34 mm tall from the bottom of the shoes to the top of the head. We assumed that the original mini was sculpted in 25 or 28 mm scale. Our figure was set in a similar pose as the original mini. The base of the recreated mini was supposed to look like an old ruined area enveloped by vegetation. The color scheme of the model was derived from the character profession (ranger), materials of the gear (leather, fur and metals) and surrounding nature.
The mini was modelled in the open source Blender 3d modelling program (Figure 2). A low resolution (polygon wise), generic female figure was imported into Blender from the MakeHuman program. Makehuman is a free, open source 3D computer graphics software designed for prototyping human characters. Clothing and gear of the character were then modelled in Blender using low polygon approaches. When all the props were ready, the character and props were merged into a single low resolution model with Boolean modifiers. Some tedious cleaning of the geometry was required after the Boolean operations. Sculpting tools in Blender were then used to model the character according to the reference. The rather messy geometry of the sculpted character was retopologised automatically with the Instant Field Aligned Meshes open source program. Multiresolution modifier was used to add more resolution to the retopologised mesh and Shrinkwrap modifier was used to wrap the resulting high resolution mesh over the original sculpted mesh to preserve the details. The method has been presented in detail by, e.g. Zacharias Reinhardt. Clay type and colored versions of the character were rendered using the Cycles renderer in Blender. For the colored version, vertices of different parts of the model such as clothing and props were selected and saved as vertex groups. Materials were then added directly to the vertex groups. The new principled (uber) shader was used to create the range of materials used on the model. The uber shader combines multiple layers into a single easy to use material node.
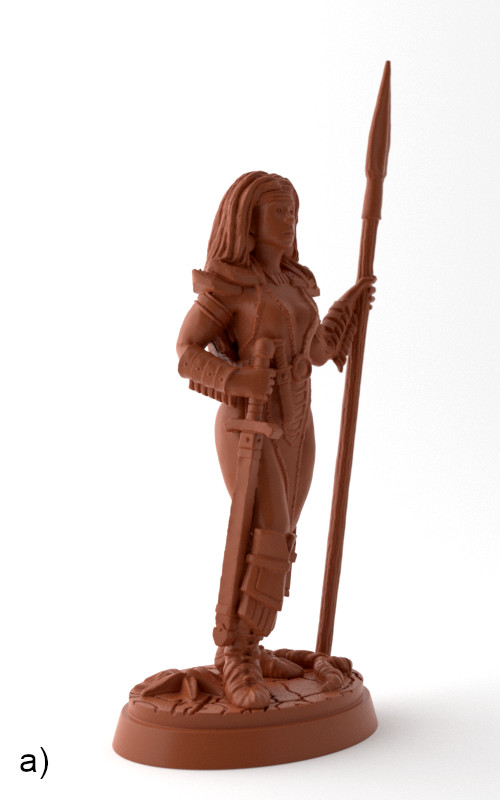
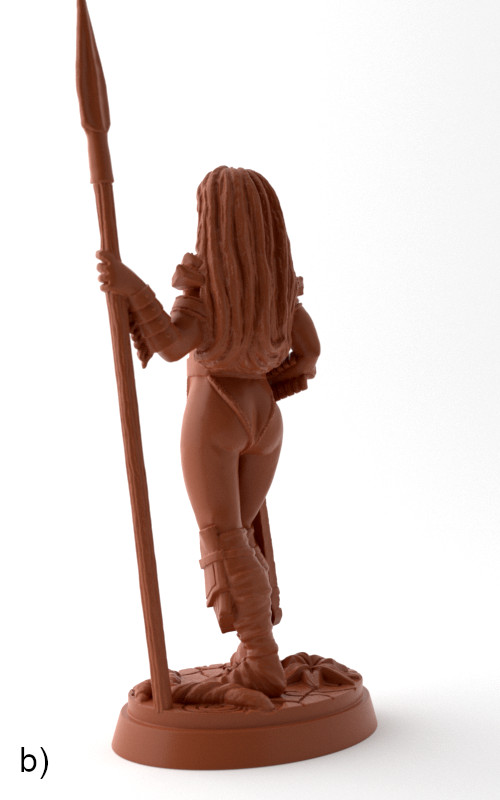
Figure 2. Synthetic image of the character rendered with a clay material from a) front and b) back. Right click on the image and select View Image for a larger version.
The model was scaled in the PreForm and Cura software by a scale factor of 1:52.5 and printed with the Form 2 and Ultimaker 3 printers (Figure 3a) provided by the Iso Omena library. For materials we used the Standard Clear and Durable Engineering resins. The layer depth for the standard resin was set to the smallest possible value of 0.025 mm and for the engineering resin to a value of 0.05 mm. Surprisingly, the smallest layer depth of 0.025 mm cannot be used with many of the special resins. Initially, one of the printers had Standard Black resin installed but we did not manage to print a mini with it due to technical problems with the printer. Also, two out of five Standard Clear resin prints were not completed successfully. It is possible that one of the layers got corrupted or did not solidify and the rest of the mini was thus not printed properly. Printing times estimated by PreForm were approximately 60–70 % of the realised printing times, i.e. too optimistic. Duration for five minis with the Standard Clear material and 0.025 mm layer depth was approximately nine hours. After each resin print batch was ready, the minis were given an isopropanol bath to remove the extra resin. The minis were then exposed to sunlight to finalize the hardening of the resin. The spear shaft of the character proved to be too thin in the Standard Clear resin prints and we accidentally broke many tips off during removal of supports and routine handling. In addition, one of the Standard Clear resin minis was broken at the ankles when we attempted to extract the mini from the printing plate. The model was also printed with an Ultimaker 3 printer using the thinnest possible layer depth of 0.06 mm and a 0.4 mm diameter nozzle. Standard dark gray PLA thread was used as a material. Printing time of a single mini with Ultimaker 3 was 1 h 50 min accurately estimated by Cura. The support structure on Ultimaker 3 printed mini was really hard to remove and the process took almost 15 min.
In the breaking test, we broke several minis printed with the investigated materials using our hands and wire cutters. The objective was to get a hands on feeling of the properties of the different materials. Generally, the minis broke easily from the ankles and the spear part was particularly fragile. The base was very resilient even though the vertical thickness was only a millimeter or two. The standard clear material broke by cracking and it was possible to easily break parts whose diameter was below 2 mm × 2 mm with bare hands. When thicker parts were cut with the cutters, the shrapnel flew all around the table, i.e. the material felt hard but somewhat fragile. Engineering Durable material felt more resistant and no spear tips of the mini accidentally broke from the batch. Like with the Standard Clear resin, Durable resin was still easily broken at thin points of the mini. When thicker parts were cut with the cutters, the material felt first slightly softer but eventually also cracked. One of the Standard Clear minis was different than the others and could withstand flexing without breaking (the spear part in Figure 3b). We thought that this could be due to different exposure to post cure UV treatment. The PLA material was softer and felt more like plastic. It was easy to break the mini at the thin points but when thicker parts were cut with the cutters the material did not crack but deformed and was cut like plastic. The breaking test was really enlightening and got us thinking how to design better parts that are more resilient and did not break so easily.
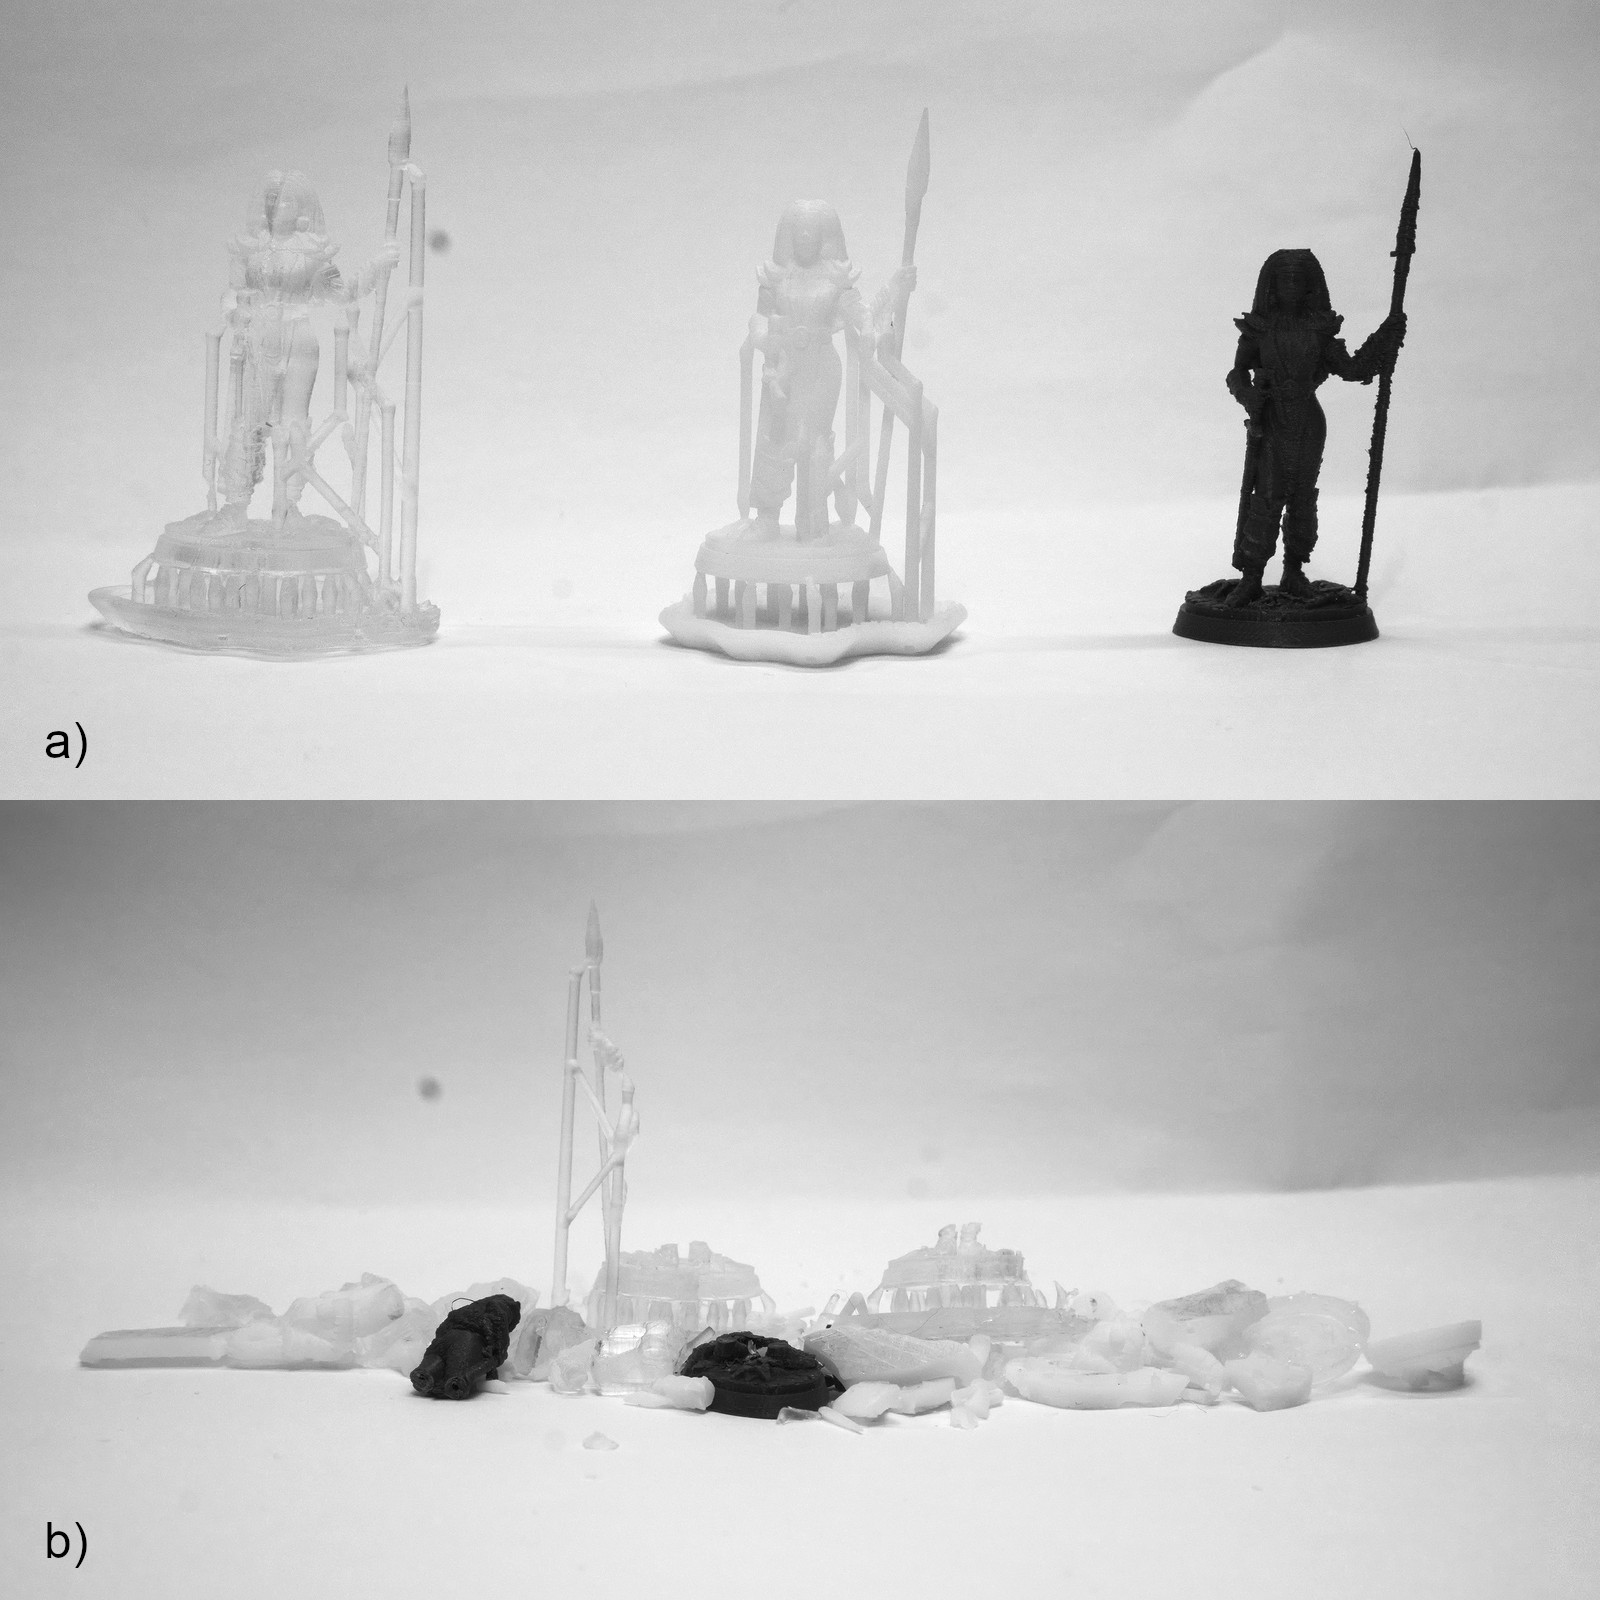
Figure 3. Miniatures printed with the Formlabs Form 2 printer and Standard Clear and Engineering Durable resins and with the Ultimaker 3 printer and dark gray PLA. The miniatures a) before and b) after the breaking test.
Before painting, support structures of the printed mini were removed with a hobby knife. Part of the sword hilt was accidentally removed but later repaired with Citadel Green Stuff modelling putty. The cleaned model was primed with the AK Interactive Surface Primer White using the Iwata Hi-Line HP-CH airbrush. Some faint layering due to the printing process was visible after priming but the effect disappeared when the painting was finished. The devised color scheme and the rendered images were used as a reference for painting (Figure 4). The airbrush was first used to apply the skin tone color to the whole model. The props were then painted according to the reference painting scheme. Special liquid high pigment Citadel Washes were used to apply shading into the crevices of the model. After the washes had dried, highlighting techniques were used to gradually lighten up the tones in the areas that catch more light. The hair was initially painted with Citadel Blue Horror Edge Paint and the visible strands were then highlighted with lighter tones ending up in pure white. The model was varnished with Vallejo Satin Varnish with the airbrush. The finished mini was photographed in a Falcon Eyes PBK-40AB-2LS photo box using a Nikon D5300 Camera and AF-S Nikkor 35mm 1:18G lens.
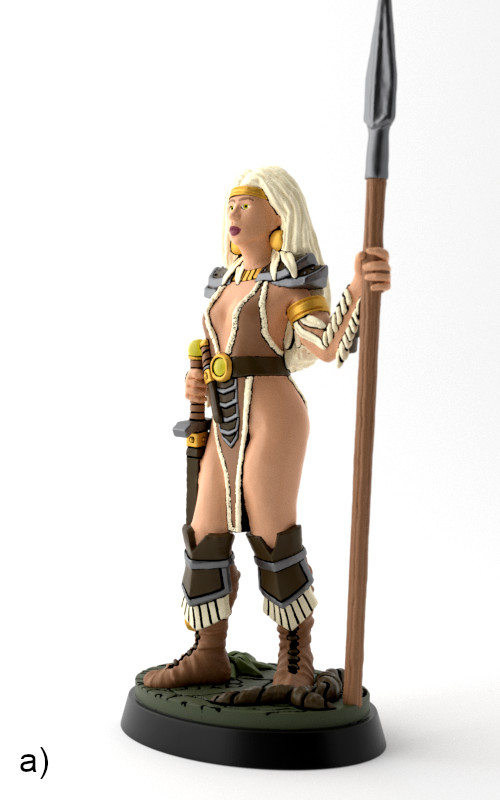
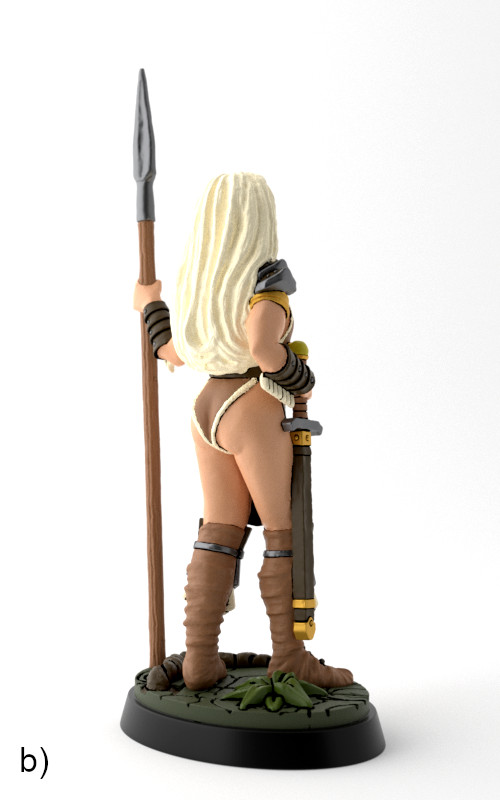
Figure 4. Rendered image of the model with the planned color scheme from a) front and b) back. Right click on the image and select View Image for a larger version.
In this project we successfully recreated a vintage, hand sculpted miniature with modern day digital approaches. When you sculpt digitally it is possible to zoom in on the model without restrictions and it is easy to get caught up in working with very small details. In retrospective, facial features, hands and many other details should have been exaggerated more heavily on the model. Still the project was good exercise and we got new insight on what kind of details can be presented on a mini. We tested the suitability of two different Form 2 printer resins for producing minis. Our opinion is that the smallest layer depth of 0.025 mm is best suited for minis because even with this resolution some layering was evident on the print. While the Engineering Durable resin cannot be used to print the smallest layer depth, the minis still looked very good and were more resilient to cracking. Both Standard Clear and Durable resins were quite brittle when used for thin features such as the spear of the character. In future projects, we have to check the designs more carefully that they do not have small features that could break easily. The white color of the Durable resin was better than the transparent Standard Clear resin because the opaque color made the details more visible. The quality of the minis printed with the Ultimaker 3 printer was surprisingly good and the printed mini could in our opinion be used in tabletop games. The removal of support structures of the Ultimaker 3 print was time consuming but it could have been faster if we had used a water soluble material for the supports. A digital color scheme was designed for the mini and used as a reference when painting the printed mini. The digital approach gave us more control to produce a unified color scheme although for example colored drawings could also be used for the same purpose.