Modelling and 3D printing a fantasy creature
By Lassi Warsta NOVEMBER 22, 2014, updated October 31, 2015
In spring 2014 I started a personal project with objectives to learn to use sculpting tools in Blender software and to try out three dimensional (3D) printing. The process is briefly described in this article. Blender is an open source 3D modelling and animation package (blender.org) and the applied version was 2.72. I decided to model a fantasy creature probably familiar to people who have played computer or table top RPGs. The design of the creature draws inspiration from a painting by fantasy artist Keith Parkinson. The model is composed of three parts: the creature, a rod, which is used to suspend the creature in air, and a scenic base (Figure 3a). The model was designed with open source software including Inkscape (inkscape.org) and GIMP (gimp.org). I used an old Wacom Intuous 1 drawing tablet in the sculpting process and worked with the model irregularly during weekends. The model was finally finished in October 2014 and printed by Shapeways 3D printing company (Figure 1b). The synthetic images (Figures 1a and 2) were rendered with the Cycles renderer in Blender.
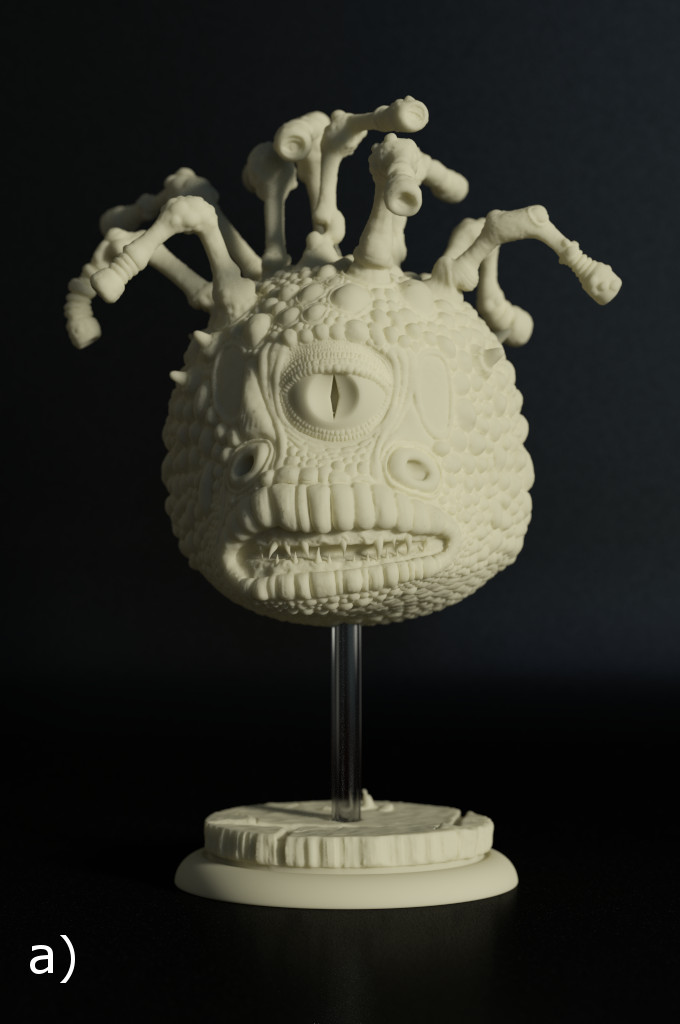
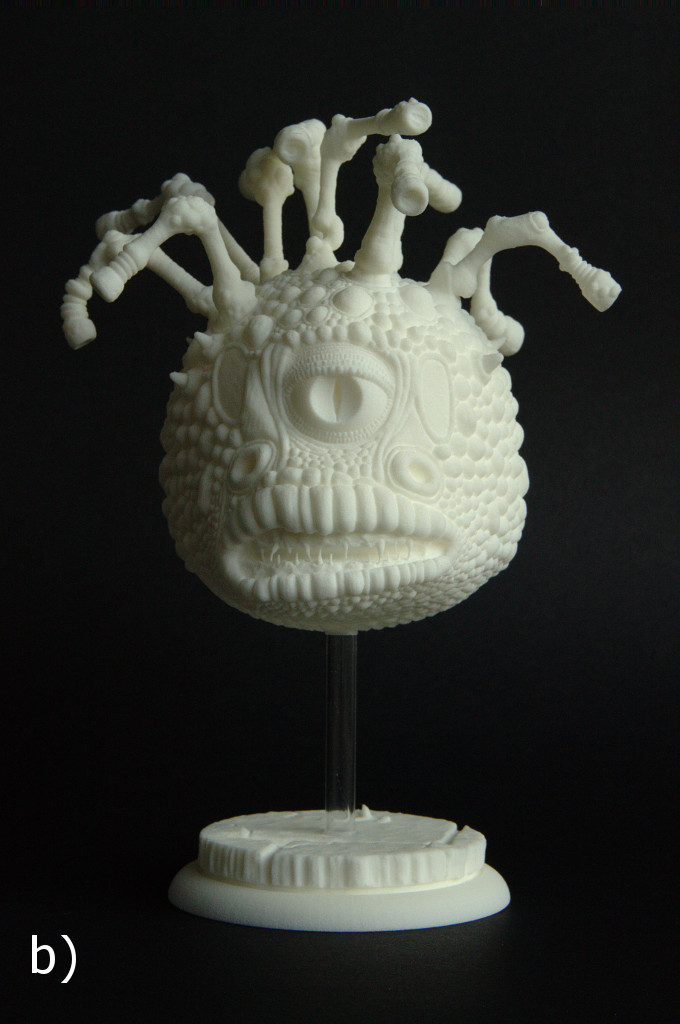
Figure 1. a) Rendered image of the model and b) a photograph of the 3D printed model (taken by Tiia Lehtinen). Right click on the image and select View Image for larger versions.
The three parts of the model were created separately in the 3D software. Also, the large central eye and the teeth of the creature were modelled separately and not sculpted. The rough shape of the creature was first created with polygonal modelling approaches and the resulting low polygon cage was subdivided with a Subdivision Surface modifier into a smooth mesh. The subdivided mesh was further adjusted with the sculpting tools (Grab tool) until a pleasing pose was achieved. Then the Dyntopo option, which dynamically subdivides the mesh during each tool stroke, was switched on in sculpting. I sculpted the model mainly with the standard Brush and Clay Strips tools. Masking tools were indispensable when working with complicated geometry such as the eye stalks. It was possible to work with one stalk at the time and hide the rest of the creature in the viewport. Different scale patterns were first laid down in Inkscape, imported into Blender as curves and then manually traced on the creature. The finished creature model is composed of approximately 5 million faces (Figure 1a). The scenic base was created with a similar approach, i.e. the rough shape of the base was first created with the Screw modifier and the details were added with sculpting. The base is composed of approximately 300 000 faces.
The objective to 3D print the model set some restrictions on the final model. Shapeways, for example, limits the model complexity into 1 million faces and the file size into 64 Mb. The Decimate modifier in Blender was used to reduce the face count of the creature below the required level (~760 000 faces). The central eye ball and the teeth were then attached to the decimated model with the Boolean modifier. MeshLab software (meshlab.sourceforge.net) was used to correct some problem areas (mainly non manifold vertices and holes) in the model parts. 3D printing costs can be decreased by minimizing the amount of material used for printing. To achieve this the creature and the scenic base were carved hollow with the following method. The parts were first duplicated and the duplicates were heavily decimated. The eye stalks were then removed from the simplified creature. The simplified parts were scaled to fit inside the higher resolution counterparts and Boolean modifiers were applied to remove the inner volumes (Figure 3a). The Solidify modifier in Blender can also be used to create a shell structure into a model but then the inner and outer surfaces have the same resolution. Boolean modifiers were used to add air holes to the creature and scenic base from which the excess printing powder can be removed after the printing process (Figure 3a).
Figure 2. Rendered turntable animation of the model. Right click outside the image and select reload page to restart the animation.
The model parts were scaled down in Blender and exported to separate stereolitography (.stl) files. Mesh Analysis tools in Blender were used to assess areas in the model that could pose problems in the printing phase. Some thin wall problems in the scenic base were corrected with automatic tools provided in the web interface of the printing company. The Strong & Flexible Plastic material (Figure 1b) was chosen as the 3D printing material because it is robust, cost effective and can depict fine details. The model was printed to a scale of 1:14.76 (Figure 3) mainly because a larger model would have been too expensive. Dimensions of the printed parts were 13.4 cm × 11.7 cm × 12.8 cm (x, y and z-directions) (creature), 8.1 cm × 8.1 cm × 1.9 cm (scenic base) and 0.7 cm × 0.7 cm × 7.25 cm (rod). The printing costs of the model parts with Strong & Flexible Plastic material were 113.57 € (creature), 18.70 € (scenic base) and 2.40 € (rod) (prices do not include VAT). The costs were calculated according to the used material volume (0.28 € / material cm3), the space that the model reserves from the printing tray (0.21 € / machine cm3) and a constant fee per object in the file (1.5 € / part). A shipping fee of 7.59 € was added to the cost. It took 10 days to print the model parts and four days to deliver the order. A transparent acryl version of the rod was bought later from ETRA.fi (3.10 € / m, VAT not included) (Figure 1b).
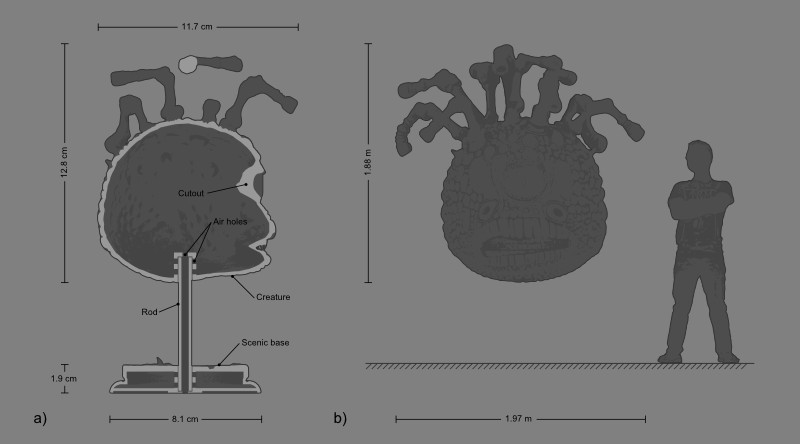
Figure 3. a) A schematic cutout of the model and b) a schematic showing the real size of the creature.
The model was successfully completed with the sculpting tools in Blender and 3D printed by Shapeways. 3D sculpting is an attracting approach for creating organic models because it resembles traditional sculpting with clay compared to polygon modelling approaches. The downside is that the resulting models have inconsistent topology and are composed of a large number of faces. These problems do not seem to pose difficulties for 3D printing as long as the model is "watertight". 3D printing is still somewhat expensive and the new cost model adopted by Shapeways, which takes into account both printing material cost and volume taken from the printing tray, increased the printing cost of the creature from 116.87 € to 140.83 € (VAT included in the price). On the other hand, printing cost of the scenic base decreased from 32.21 € to 23.19 €. The Strong & Flexible Plastic can also be colored with different dyes and polished, which would be interesting to test in the future. There are also many other printing companies (e.g. Cubify, i.materialise and Sculpteo) that provide similar services but I did not do extensive price comparison between them.